This tutorial will help you to install ClassicWB in FS-UAE. Before you start, you should ensure you have FS-UAE Launcher and FS-UAE installed already, and that you have the required kickstart for Amiga 1200 and 4000. You also need a disk image (ADF) of a Workbench 3.0 or Workbench 3.1 disk.
Downloading and Extracting ClassicWB

It isn’t entirely obvious, but there is a download link there – honestly!
First, you need to download ClassicWB. ClassicWB comes in different flavours depending on what Amiga hardware capabilities you’ve got. There is also a special version for UAE Amiga emulators, and that’s the one we’re going to use. So head over to the download page and click on the “UAE” link to download ClassicWB_UAE_vXX.zip. At the time of writing, this is ClassicWB_UAE_v28.zip. I’ll refer to it as ClassicWB_UAE_vXX.zip throughout the tutorial.
Now you need to decide where you want to have ClassicWB stored. I suggest the following location: Documents/FS-UAE/Hard Drives/ClassicWB, but you can put it anywhere you like. The rest of the tutorial will assume this location.
- Create an empty folder
Documents/FS-UAE/Hard Drives/ClassicWB - Create an empty folder
Documents/FS-UAE/Hard Drives/ClassicWB/PC - Open
ClassicWB_UAE_vXX.zip, browse into ClassicWB_UAE_vXX and then Hard Disk. Extract the Software folder and the two .hdf files toDocuments/FS-UAE/Hard Drives/ClassicWB.
Initial Setup
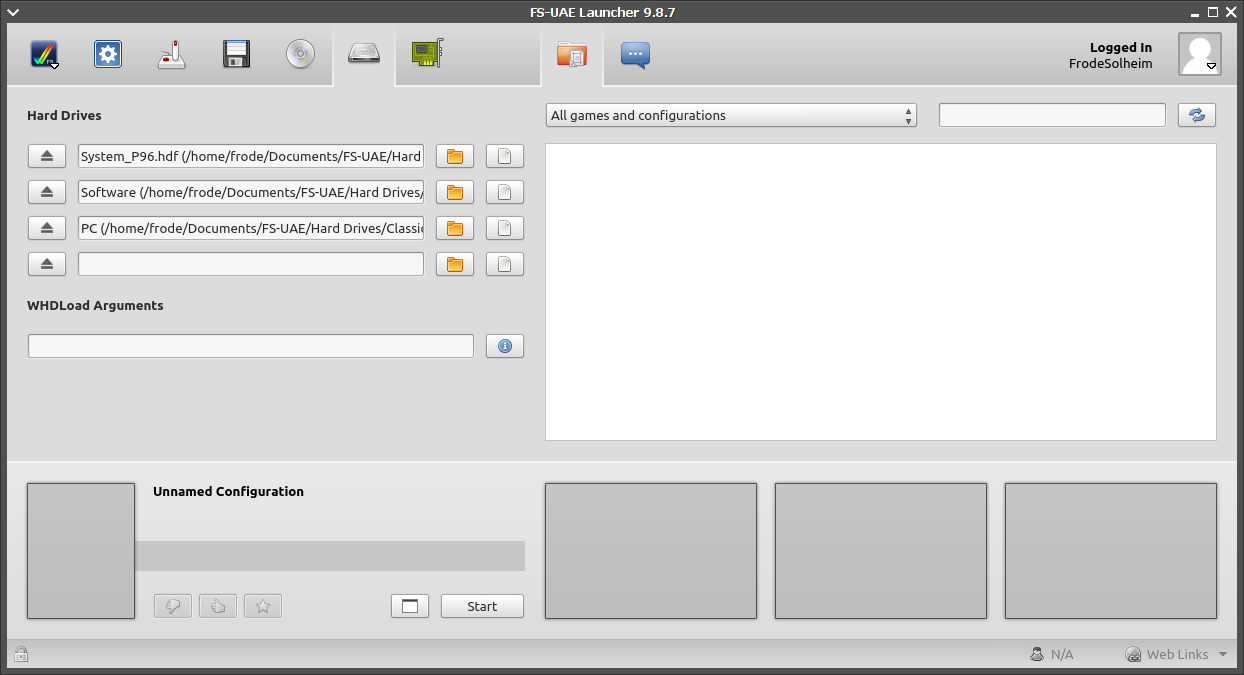
All three hard drives have been added to the hard drive tab.
- Click the “New Configuration” button in the main tab to ensure you are starting with a blank slate.
- Change Amiga model to Amiga 1200.
- Go to the hard drives tab, and click on the file button for the first hard drive and select the
System_P96.hdffile you just extracted. - Click on the folder button for the second hard drive and select the
Documents/FS-UAE/Hard Drives/ClassicWB/Softwarefolder. - Click on the folder button for the third hard drive and select
Documents/FS-UAE/Hard Drives/ClassicWB/PCfolder.
You also need to provide one or more Workbench disks, because ClassicWB needs to copy some files off this/these. You have three options here:
- Use a Workbench 3.0 disk – You’ll then end up with a WB 3.0 ClassicWB install.
- Use a Workbench 3.1 disk – You’ll then end up with a WB 3.0 ClassicWB install with some WB 3.1 files.
- Use the full set of Workbench 3.1 install disks – You’ll then end up with a WB 3.1 ClassicWB install.

Here I have added all six 3.1 disks from Amiga Forever to the floppy swap list. Note that no disk is inserted into any drive.
Go for the last option if you have all six Workbench 3.1 disks. You now go to the floppy tab, and use the plus button to add floppy disk images to the swap list – because the disk(s) must not be inserted in a floppy drive during boot. So either:
- Select your Workbench 3.0 or Workbench 3.1 disk (note: you need the “Workbench” disk, not the “Install” disk).
- Multiselect all your 6 Workbench 3.1 disks.
Install ClassicWB
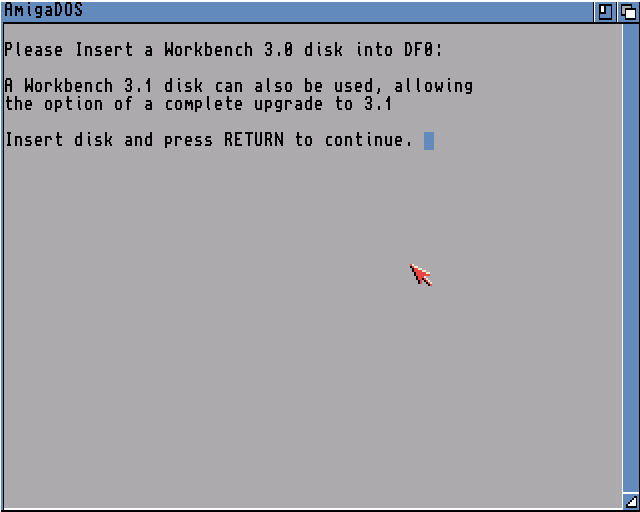
ClassicWB installer requesting a workbench disk to be inserted into the first floppy drive.
- When asked to insert disk, open the FS-UAE menu, navigate down to the first floppy drive with your arrow keys and press
return. - Either select your single Workbench disk – or, if you’re using the full Workbench 3.1 set – insert disk 2 of 6. Press
returnto insert the disk. - If you chose a Workbench 3.1 disk, you’ll be asked if you want to upgrade to Workbench 3.1. Type
yandreturnif you have all six disks, otherwise, typenandreturn.
You also need to press return when back in the AmigaDOS prompt to continue with the installation. If you press return too quickly, a requester will appear, but just click on the Retry button if this happens.
If you are asked for disks by name and cannot see the names in FS-UAE, the disks are Extras (3 of 6), Fonts (6 of 6), Install (1 of 6), Locale (5 of 6) and Storage (4 of 6).
After the installer is done copying files, you’ll be asked whether you want to enable or disable OldIcons. This is just a matter of preference so you can answer any of them.
When the message “Please remove the Workbench disk and reboot” appears, simply quit FS-UAE.
Install ClassicWB/ADVSP (Optional)
This step is optional. The previous step configured a system drive with support for Picasso 96. This step will install an alternative system drive which runs on more “classic hardware”.
Go to the hard drives tab, and click on the file button for the first hard drive. Choose System_ADVSP.hdf (replaces System_P96.hdf). Start FS-UAE and you’ll be greeted with the same installation program as you saw in the first boot. You go through the installer, and do exactly the same things as you did during first boot.
After the installer is done copying files, you’ll be asked a couple of questions. This is a matter of preference, so you can choose anything. Here are some suggestions:
- Choose Theme: Retro
- Copper Background: Disable

The configuration is now saved, and is added to the configurations list to the right.
Again, when the message “Please remove the Workbench disk and reboot” appears, simply quit FS-UAE. We’ll now save this “classic configuration” as “ClassicWB (Amiga 1200)”:
- Go to the floppies tab, and use the clear button to remove the floppies from the floppy list.
- Go to the main tab, change config name to “ClassicWB (Amiga 1200)” and click the save button.
Final Setup
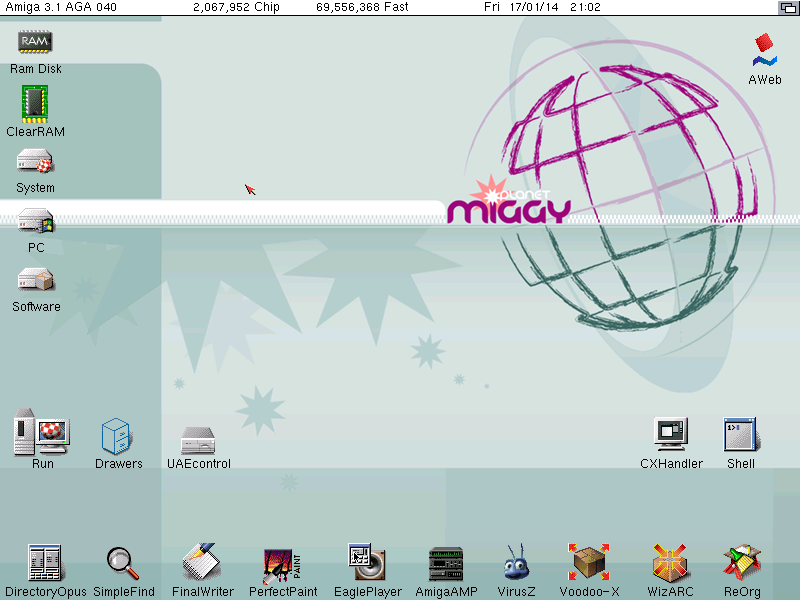
OMG!!! It works!!!
We’re now done, and will set up hardware for an expanded Amiga 4000 and save the config as “ClassicWB (Amiga 4000)”:
- Go to the floppies tab, and use the clear button to remove the floppies from the floppy list (unless you already did it and the floppy list is now empty).
- Go to the main tab, change config name to “ClassicWB (Amiga 1200)” and click the save button.
- Change the primary hard drive back to
System_P96.hdf. - Change Amiga model to Amiga 4000 (68040).
- Go to the memory options tab, check Zorro III RAM, and choose 64 MB (or more if you like).
- Go to the expansions tab and choose graphics card UAEGFX and enable UAE bsdsocket.library.
- Go back to the main tab, change config name to “ClassicWB (Amiga 4000)” and click the save configuration button.
Click Start to start FS-UAE and boot into ClassicWB! Congratulations 🙂
(You’ll get a different desktop environment depending on whether you boot the Amiga 1200 config or the Amiga 4000 one).
Keymaps, locale and regional settings (Optional)
The following section is copied verbatim from the ClassicWB installation instructions:
ClassicWB defaults to the Great Britain locale and keymap settings. Obviously this is no good if you live elsewhere and your time zone and keyboard layout differs.
In order to change these settings, do the following:
- Move the required keymap from the “Storage/Keymaps” to “Devs/Keymaps” drawer.
- Place the “gb” keymap back into the “Storage/Keymaps” drawer, or it will take up memory.
- Reboot the Amiga and open up the “Prefs/Input” requester.
- Select your corresponding keymap and save the setting.
- Open up the “Prefs/Locale” requester and select your region, again saving the setting.
Note that those with an American keyboard layout are able to simply remove the “gb” keymap, placing it back into the “Storage/Keymaps” drawer, leaving the “Devs/Keymaps” drawer empty. The required keymap is built into the ROM as its default setting, so to finish just save the “Prefs/Input” with “American” selected.
Enable JIT (Optional)
You can enable the JIT compiler to make the emulated system several times faster.